If you’re just entering the world of Google Merchant Center and Google Shopping, you might feel a bit lost when it comes to utilizing their benefits or the nuances between them.
In a nutshell, Google Shopping is a platform where consumers can browse through millions of products and filter them by various categories, such as brand, price, location, article type, etc. This helps them find and compare products from multiple retailers in one place.
On the other hand, Google Merchant Center is a platform where businesses of all sizes can store and modify their product data, such as images and prices, which is uploaded to Google. Merchants also receive insights and analytics about their products’ performance, which helps them increase their visibility and target the right audience, and with that, increase their conversions.
In this article, we’ll dive into all of the essential tips and tricks to help you learn how to add products to your Google Merchant Center account. Let’s start by discussing the product data requirements for Google Merchant Center and then move on to product feeds and troubleshooting common issues.
Table of Contents
What Are the Product Data Requirements for Google Merchant Center?
To create free listings and ads on Google Merchant Center, you’ll first have to submit the required product data attributes. Let’s see what they are.
ID (Unique Identifier)
All of your products need to have a unique identifier: [id]. You can add up to 50 characters, but merchants usually stick to short names, such as “A1B3.” You cannot use the same word twice and must add unique values for each product.
Title
As the name suggests, the [title] is the name of your product. It should accurately describe it without any promotional text, like “Women’s Plaid Blazer”, and be up to 150 characters long.
Description
After creating an ID name and title, you must add a product description [description]. Since you can use up to 5000 characters, you can add an in-depth description of the most essential attributes of your product.
Keep in mind that you should only include relevant data about your article without any additional information, such as a link to your online website or info about other products.
Here’s an example of a detailed and informative product description: “Made from 50% silk and 50% acrylic fiber, this women’s plaid blazer is an oversized fit and has the brand’s logo on the right top side. Should not be washed in a washing machine; hand-wash only with cold water and detergent; imported.”
Link
Another attribute you’ll have to include is the product’s landing page URL, simply known as [link].
Image Link
The product should also have a main image, i.e., [image link].
An additional image URL
It’s highly recommended to also add an additional image [aditional_image_link] to improve the product’s visual appeal. To do that, add its URL and use up to 2000 characters. Remember that the image should comply with the rules about the attribute known as [image link].
There are a few exceptions to this, though. For example, it can include specific article staging or show different ways you can use the product. You can also use illustrations or graphics, in addition to photographs. You can add up to ten additional images to each product image.
Mobile link
Finally, you can add a [mobile link], your product’s landing page URL specifically optimized for mobile. Just keep it compliant with the specific guidelines for the [link] attribute.
Tips for Optimizing Your Product Data to Increase Visibility on Google Shopping
As you might already know, how you describe and present your product data in Google Merchant Center is essential if you’d like to have successful free listings and ads on Google. There isn’t any simple trick to create successful ads, but there are a few things you can try in order to optimize the product data.
Here are some tips and tricks to help you gain better campaign results quickly.
Make a marketing strategy for your target audience
First, let’s see the best ways to make a marketing strategy for your potential customers.
Map out strategic customer journeys
Improving the overall shopping experience of your target audience on your website should be your number one priority. You can start by mapping out potential customer journeys to find ways to improve your customers’ shopping experience.
For example, you can brainstorm ways to improve the landing pages, product data, or checkout process. Remember that you’ll gain more potential customers if the interface design of your landing page is intuitive, user-friendly, and contains specific content that describes the products in detail.
Keep the best-selling products your priority
To ensure a steady flow of income, you’ll have to prioritize some products. For example, you can focus on your best-selling products that substantially impact your return on investment by optimizing the product title and description, using high-resolution images, adding more additional images, and so on.
Use optimization techniques
You can also try various product data optimization techniques to find what works best with your target audience. Then, test how they’re performing and whether there’s some noticeable difference in your performance metrics.
Include essential details about your products
In addition to improving your marketing strategy, you also need to include essential details about all of your products.
Add relevant product attributes
If you want to advertise your products to the right audience, adding important attributes is crucial! For example, you can add easy-to-remember product names and information such as color, size, age groups, size types, etc. Once you do that, you’ll notice that your products will appear to specific audiences and match Google’s search queries much better.
Add key details
Another thing that you can add is specific details about a product before its official title and in the product description. Usually, merchants do this if these details are not included in the photographs. Always add only compelling and important key details that will make your potential customers more interested in your products.
Add HQ images
Using high-quality images should be another priority if your goal is to create a more positive customer experience.
This increases the chances for your products to appear in search queries and attract your audience’s attention. Plus, using good imagery shows people that you’re a real pro and your business is legitimate. A bonus tip from us: avoid images with promotional logos or messages.
Add updated and complete product data
Updating and completing your product data is another priority. Here’s what you need to keep in mind.
Update the latest information on product availability and price
Not updating your products’ availability and their current price is guaranteed to cause a bad customer experience.
This can only lead to frustrated customers and bad reviews. To avoid that, maintain the latest information on availability and price and always include essential data on shipping, tax, or feed delivery.
Add the most important type values
Always make sure you arrange each product by product type and category. For example, you can add your products to both a more broad product group and a more specific product group. Don’t add unnecessary promotional texts, synonyms, or some other terms; categorizing your products by their type is enough.
Add all the essential product data requirements
Don’t forget to add all the product data requirements we already talked about. These include your product’s ID, title, image, additional images (if there are any), etc. By doing so, all of your products will preserve their data history, and by adding a title, your customers will be able to find exactly what they’re searching for pretty quickly.
Add the GTIN attribute (if necessary)
Global Trade Item Numbers (GTINs) help Google Merchant Center determine the exact product merchants are advertising. And guess what? Merchants who add GTINs get approximately a 20% rise in their website’s clicks! Plus, by adding a GTIN, the product can appear on Google’s partner platforms, such as YouTube.
How to Create a Product Feed for Google Merchant Center
If you want to create a primary feed in Google Merchant Center, you’ll need to create a brand-new delimited XML file, text file, or API. Google recommends starting with a delimited text file.
The feed is basically the information source that helps Google sort out your products and advertise them. Naturally, the second step is to add all of the necessary product data attributes for free product listings and inventory ads:
- ID [id]
- Title [title]
- Description [description]
- Image link [image_link]
- GTIN [gtin]
- Brand [brand]
- Excluded destination [excluded_destination]
Tips for Selecting the Right Format for Your Feed
Google Merchant Center recommends that merchants use either Google Sheets or Microsoft Excel since both spreadsheet programs are supported by GMC and are pretty easy to manage.
Although both are supported by GMC, Google Sheets is certainly the easier and better choice, since you can simply download all the files you want and add them to your Merchant Center account.
There’s one disadvantage that you need to take into account, though – by using spreadsheets programs, you can create formatting mistakes from time to time. If you’d rather use XML, save all the fields in a so-called “supported file” with a filename extension.
How to Upload Your Product Feed to Google Merchant Center
First, click “Products,” and then click “Feeds.”
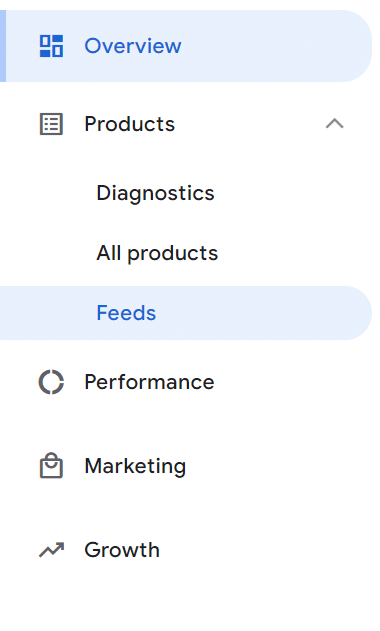
A screenshot of the left-side menu in GMC where you can find “Overview” and “Feeds”
Find the feed you’re looking for, and go to the column called “Feed name” where you can select a feed name for the specific file you’re about to upload.
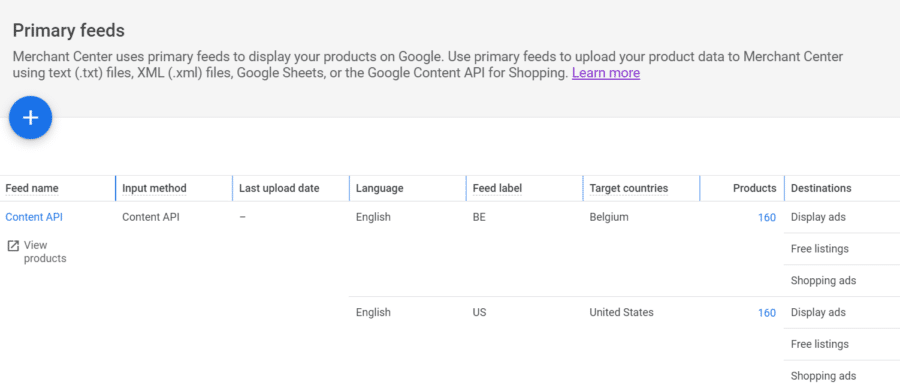
A screenshot of GMC’s “Primary feeds” and “Feed name”
You’ll notice two options in the header’s right corner – “Upload file” and “Access Google Sheets.”
Choose one of these options and upload your file. To see how your file will look before submitting it, click “Upload as test.” You can learn more about the testing option here.
Keep in mind that the upload process usually takes a few minutes, but if you’re eager to see how long it’ll take, click “Processing”. The status of your feed will be available approximately half an hour after processing. To find it, click “Diagnostics” and go to “Products”.
How to Troubleshoot Common Issues During the Upload Process
In some cases, your product feed can be larger than the size supported by Google Merchant Center and won’t upload. To avoid this issue, make sure that the file is not larger than 4 GB.
There’s another problem that can arise during automatic uploads – the URL that you’re using doesn’t have the required permission for downloading the data or it’s roboted, or it simply isn’t working and redirects you to another page without the uploaded data feed. To avoid such issues, make sure that the compressed files you’re uploading are up to 500 MB.
Best Practices for Managing Your Product Data in Google Merchant Center
- Make sure your product data is updated: Always review, edit, and update all your product data, such as the images, descriptions, prices, titles, and availability. If the data is outdated or incorrect, your products will either be rejected or have a bad performance score.
- Optimize and edit the product listings: Always use HQ images and important and concise keywords in the description and title of your products.
- Keep track of your performance: Make sure you’re monitoring the conversion rates and optimize your bids frequently by using data insights for your products, locations, and categories.
- Use GMC’s advanced settings: Use advanced features, such as promotions, dynamic remarketing, and local inventory ads.
How to Write Compelling Product Titles and Descriptions?
To make the most of your product titles, use the 150 characters and add all the necessary details about your products. By adding more characters, you’ll be able to target your audience much easier.
Don’t forget to add relevant keywords, such as the brand and the product’s name, and start with unique details that make the product stand out. According to Google Merchant Center, customers can only see 70 (or even less) characters on their devices.
When you’re writing descriptions, keep things accurate and concise, and here also add the most relevant information first. Although you’re allowed to add 5000 characters, your potential customers will probably only read the first 500 characters, so keep that in mind.
Lastly, don’t forget to include all the important attributes and features of the product, such as the shape, size, material, age range, pattern, texture, variants, design, etc.
Ready to Upload Your Product Data?
We hope that after reading our brief guide on how to add products to your Google Merchant Center account, you’re finally ready to start uploading your product data!
Before you do that, here’s a brief reminder on what to focus on when optimizing your product data:
- Always keep your product data in line with Google’s guidelines and policies
- Test your product feed before uploading it
- Make sure you’re product data is always up-to-date
- Check the size of your files before uploading them to avoid unwanted error
- Keep your title and description accurate, straightforward, and user-friendly